A permanent solution for the reoccurring Minox 35 shutter failure
Problem
Contrary to popular belief, the primary shutter problem in the Minox 35 series is not an electronic but a mechanical problem that can be easily fixed. The reason for this reoccurring problem is that the shutter engage pivoting mechanism slides down over time. This causes the close shutter lever to not latch. This problem occurs in models from EL to ML.
Cause
At the factory/production, the pivoting mechanism is adjusted to position and the two screws holding it are tightened. After which an epoxy like substance is poured onto the screws to prevent it from sliding down. After some time, the epoxy looses its hold on the screws or a service personnel may have repaired the camera by unscrewing and adjusting the lever without re-applying a new epoxy. In my findings, it seems like only the screws on the early EL models were applied with an epoxy. I have not seen it being used on other later models. The screws holding the shutter engage pivoting mechanism eventually slides down due to strong counter tension created by the 2 shutter springs.
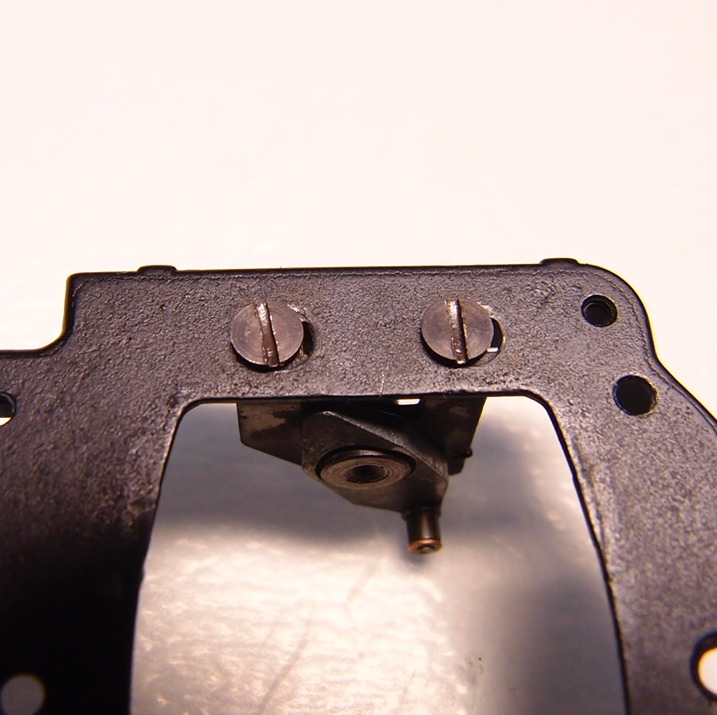
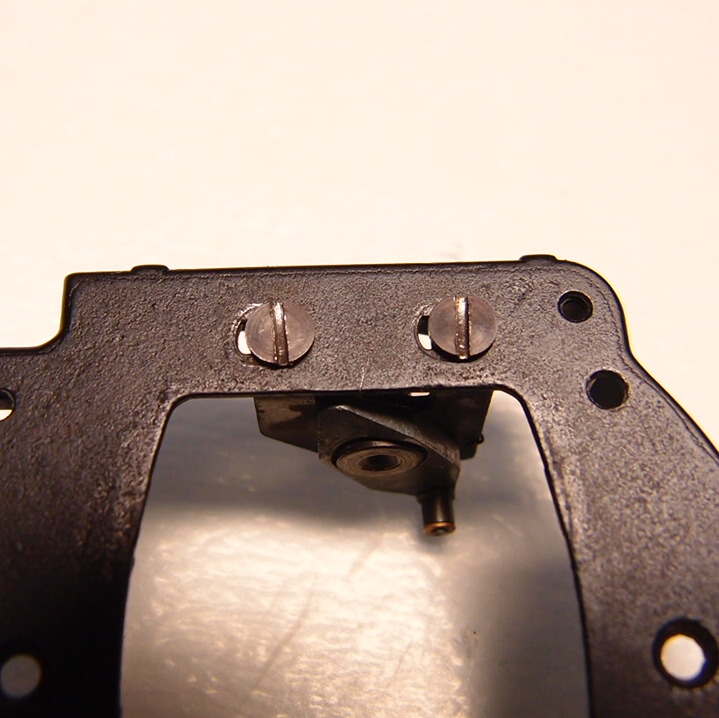
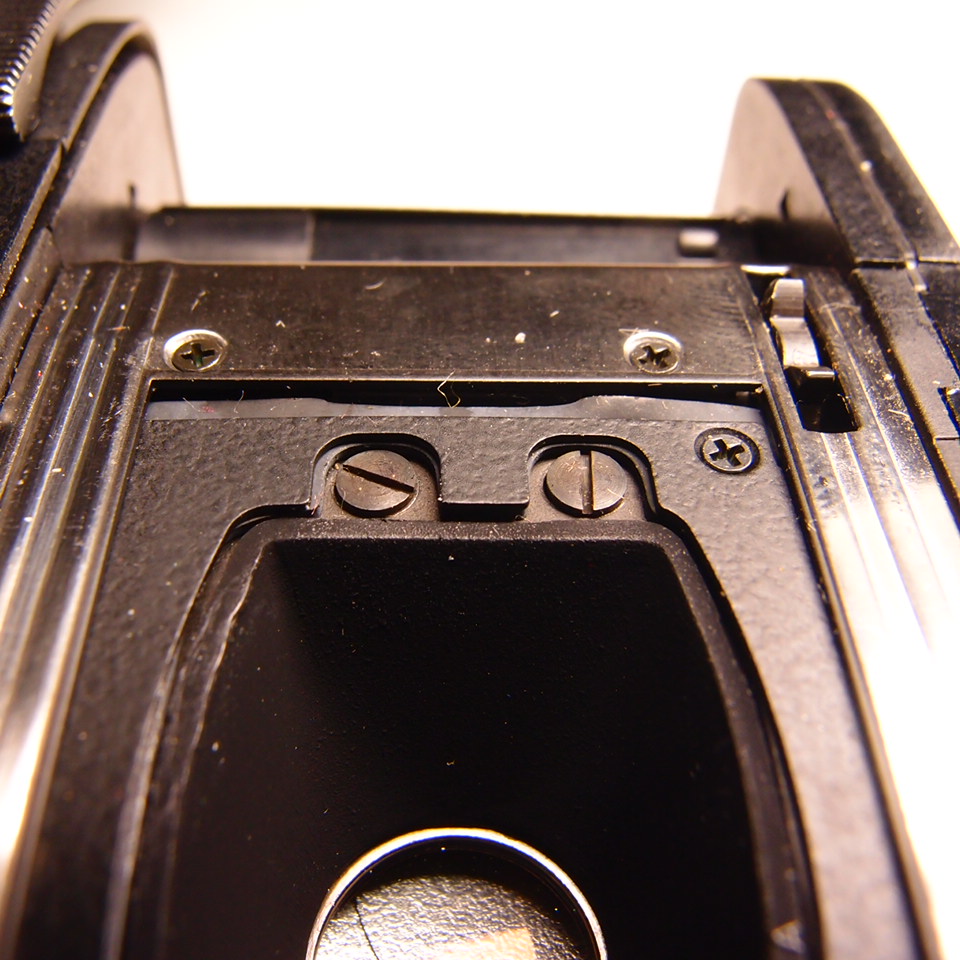
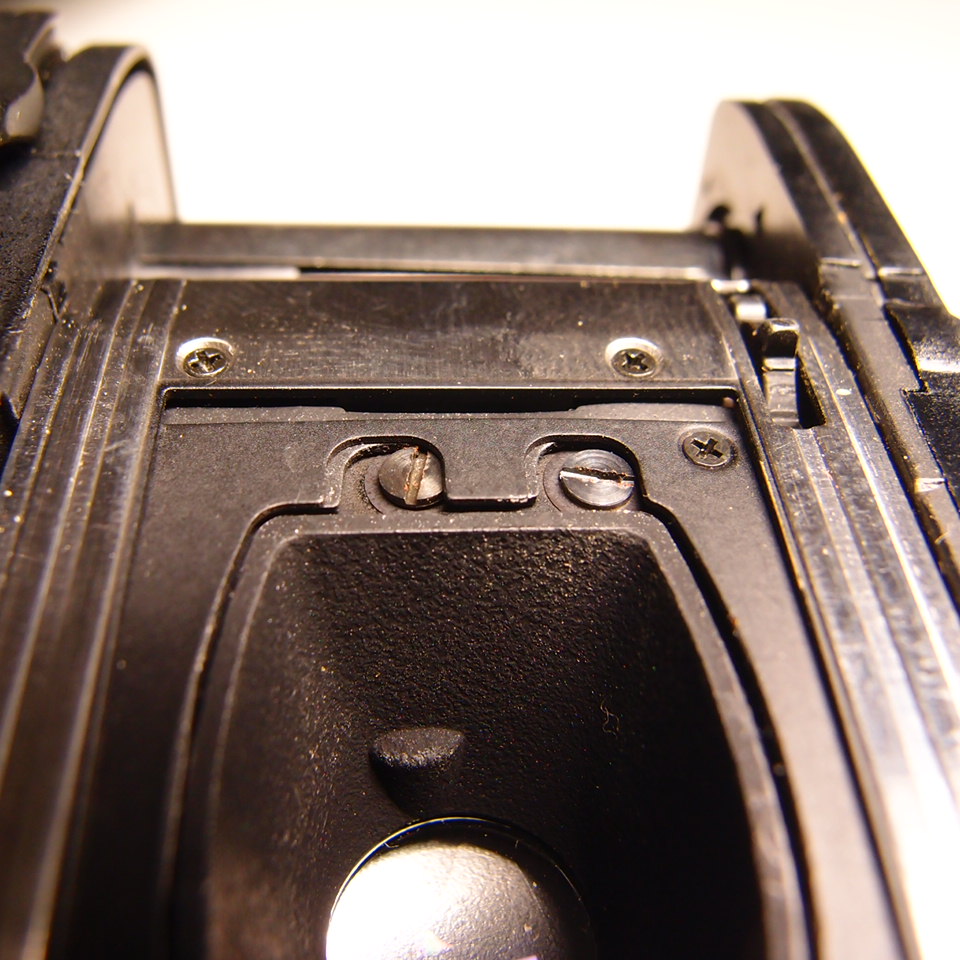
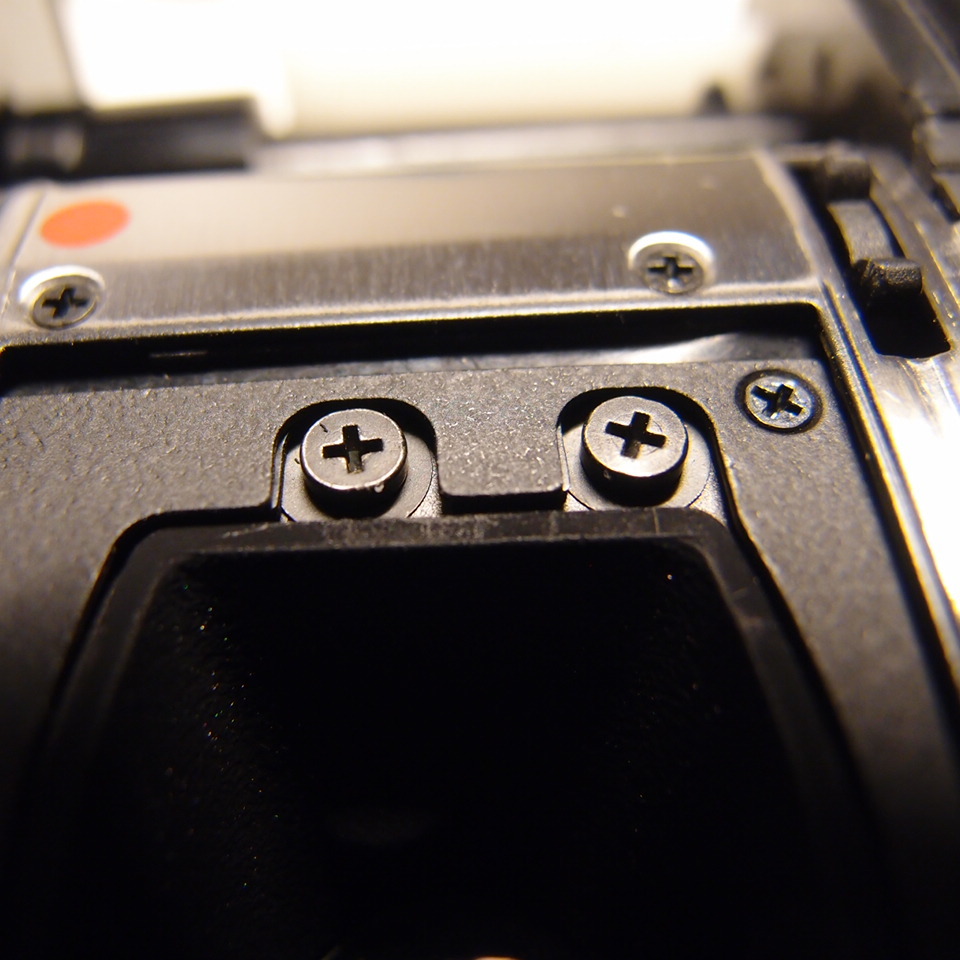
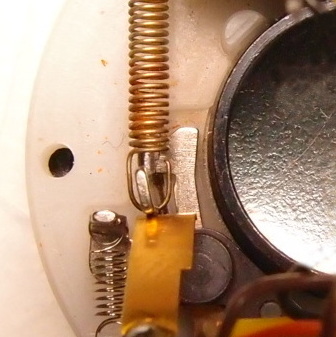
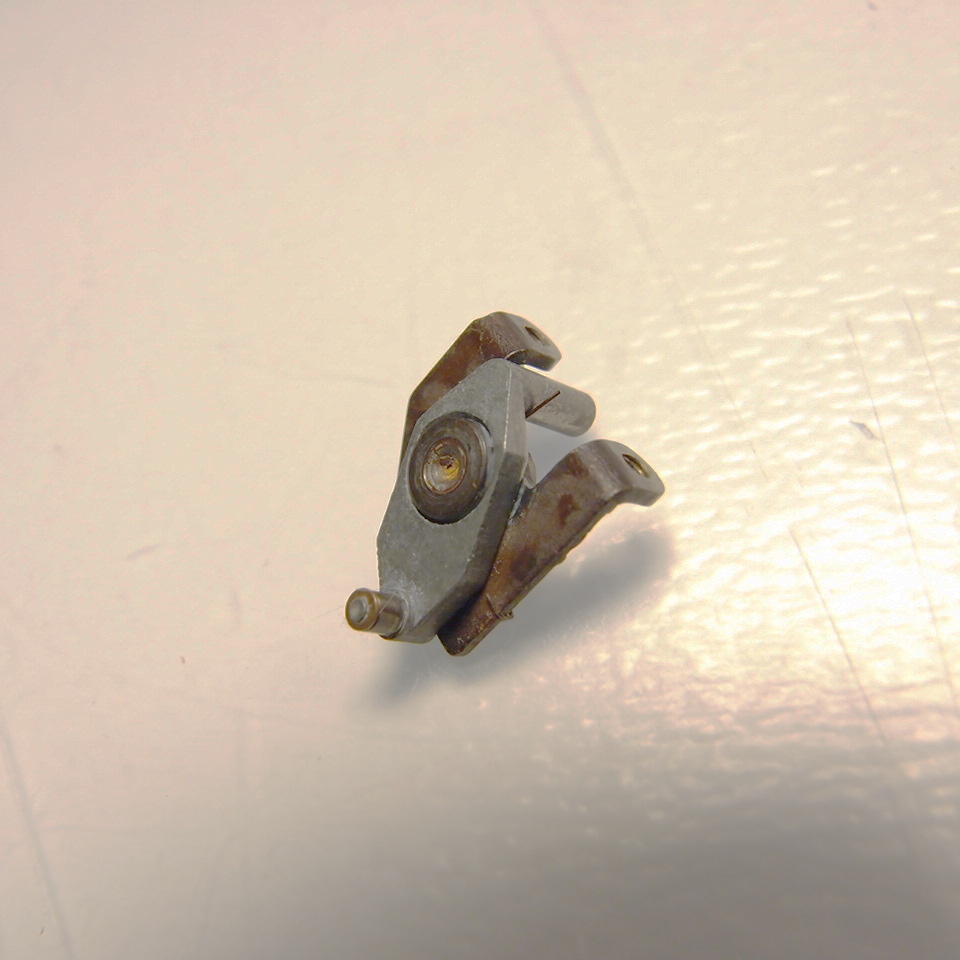
Epoxy residue of an early EL model and 2 photos showing the displacement of the shutter engage pivoting mechanism.
Solution
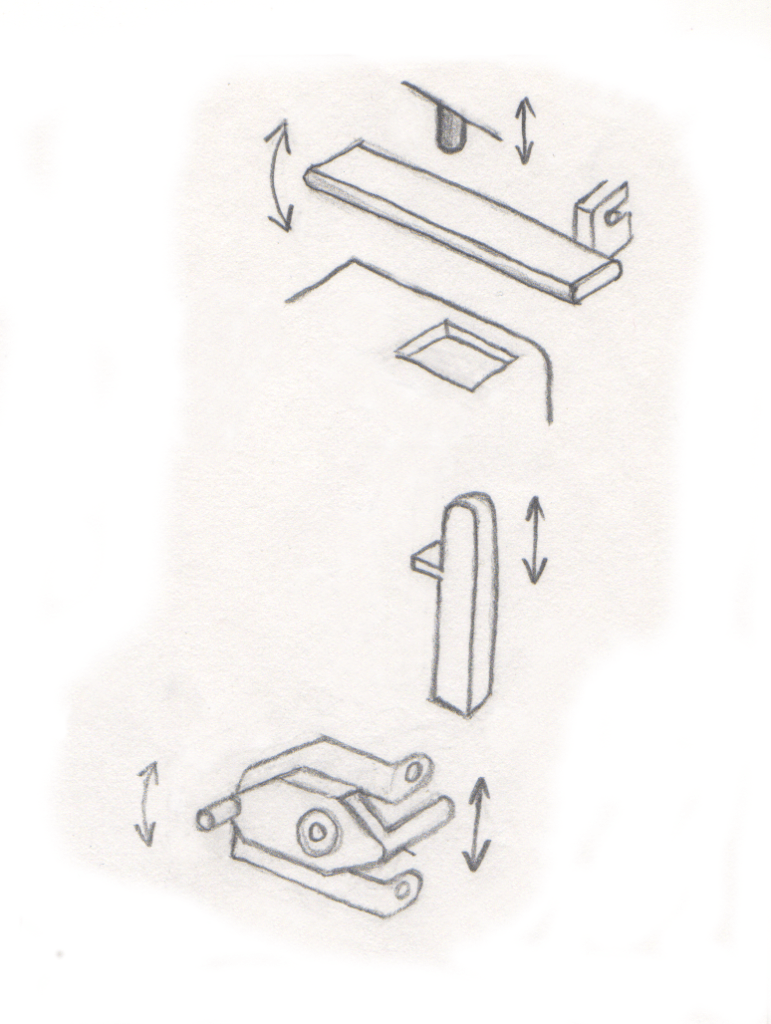
By placing a small plastic wedge measuring about 0.7 mm in thickness below the Shutter Engage Pivoting Mechanism, this would prevent the mechanism from sliding down over time.
Plastic Wedge Measurement – Critical
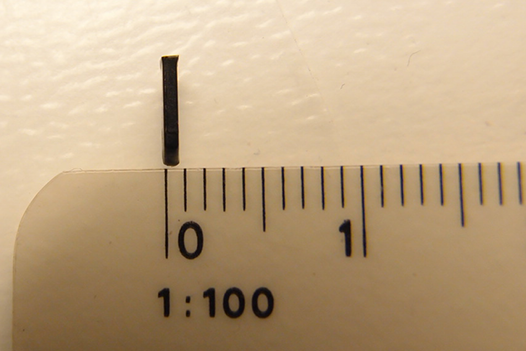
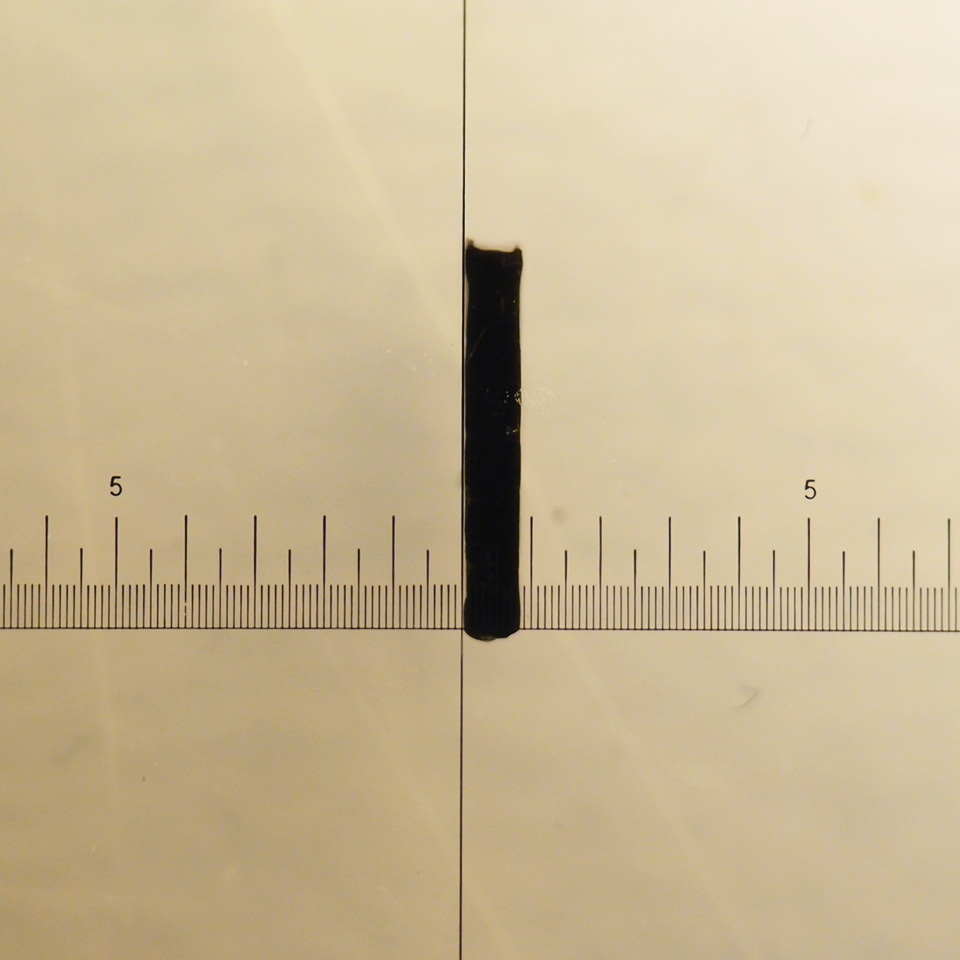
The wedge needs to be about 0.7 mm in thickness.
If it is too thick, then the film advance will be too stiff at a certain point.
If it is too thin, then the close shutter will not latch.
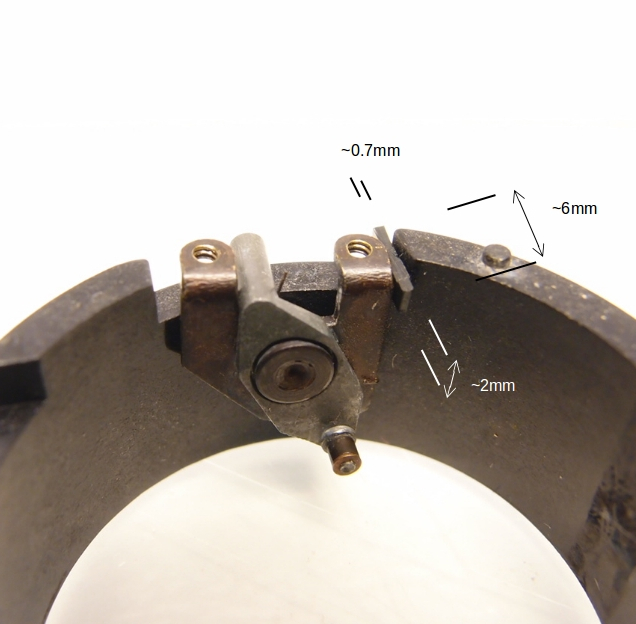
The Shutter Engage Pivoting Mechanism with a precise measurement of the wedge.
Steps
The following steps can be done with/without the batteries.
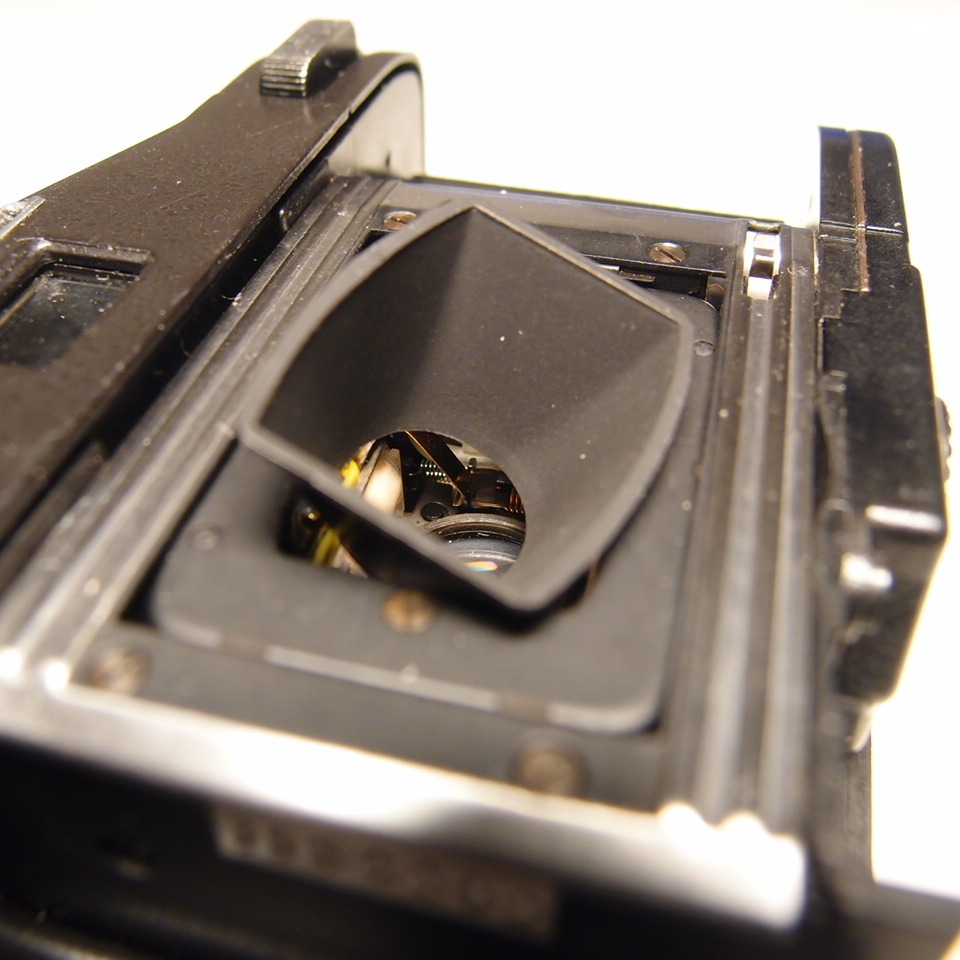
- With the lens retracted, remove back cover.
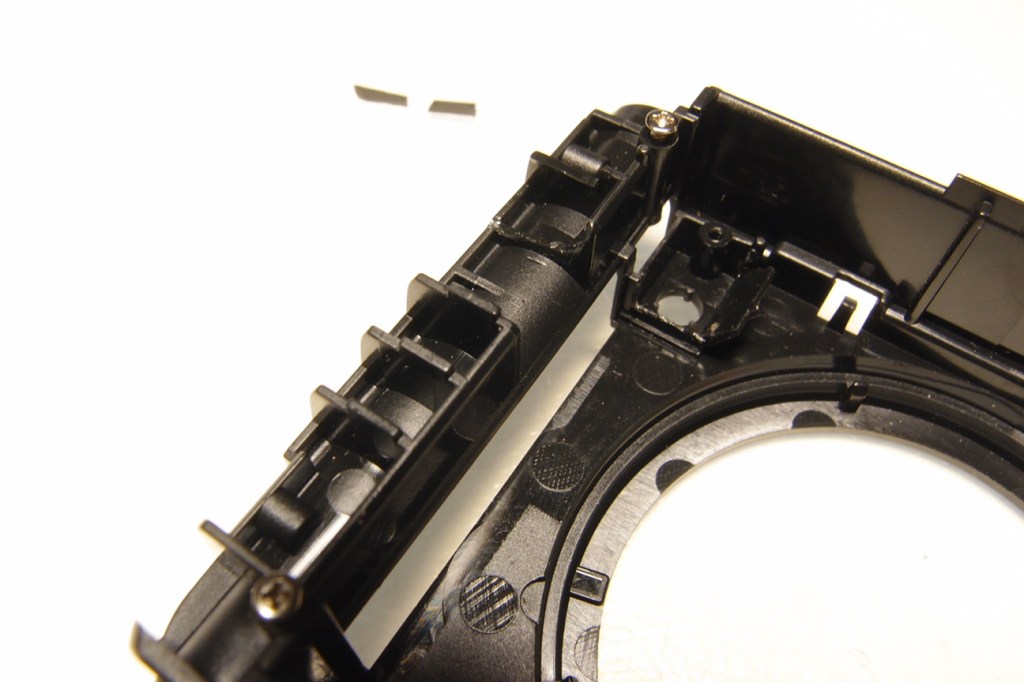
- Remove the plastic cone with your fingernail (pinching top & bottom of cone)
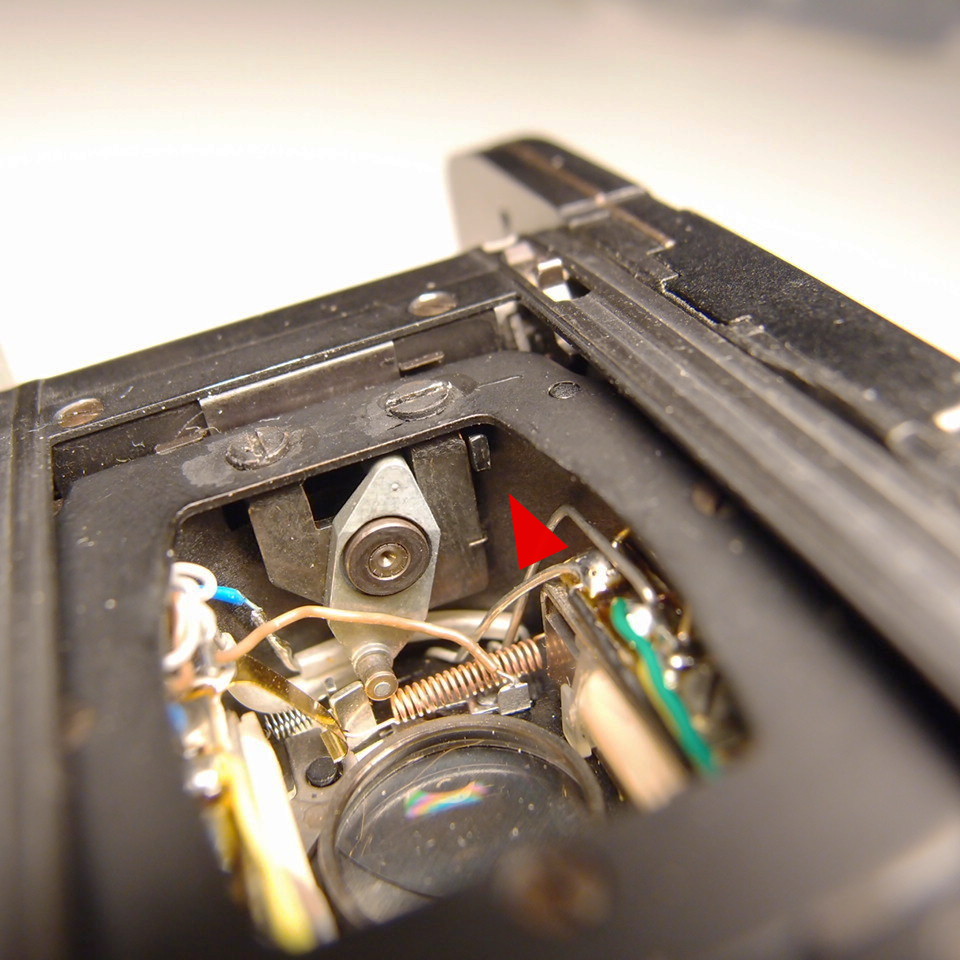
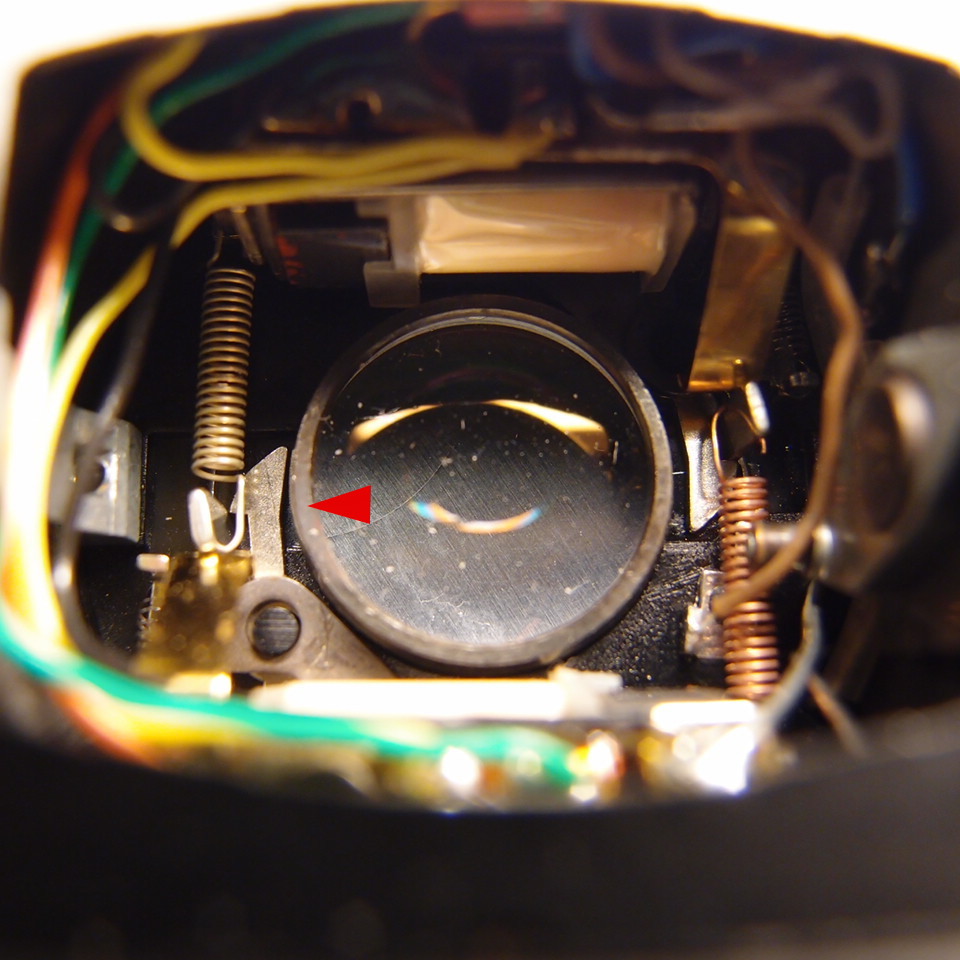
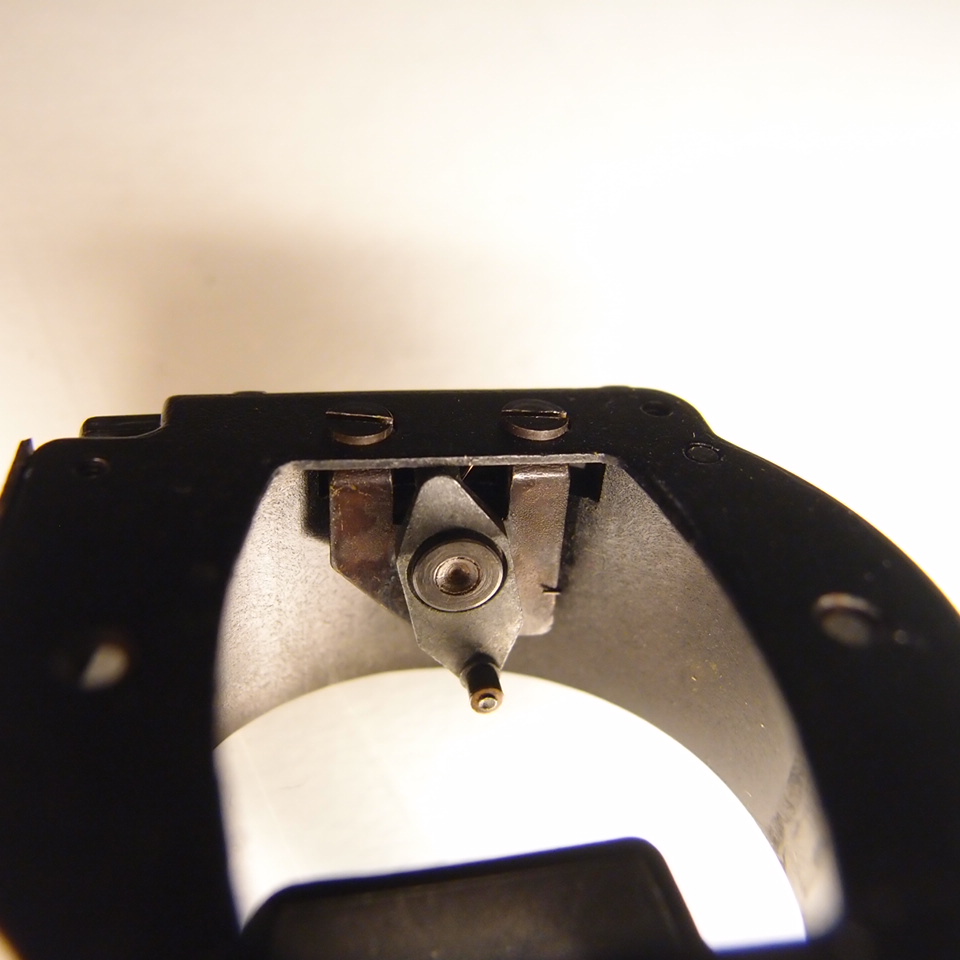
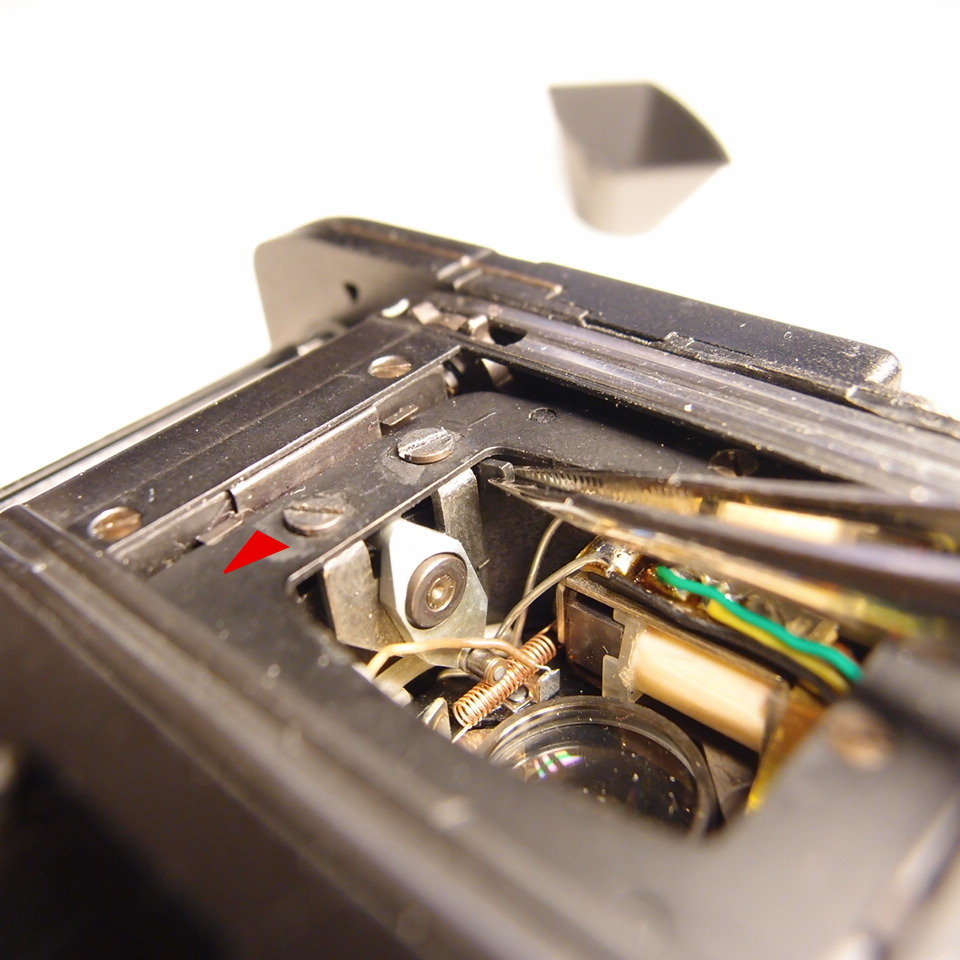
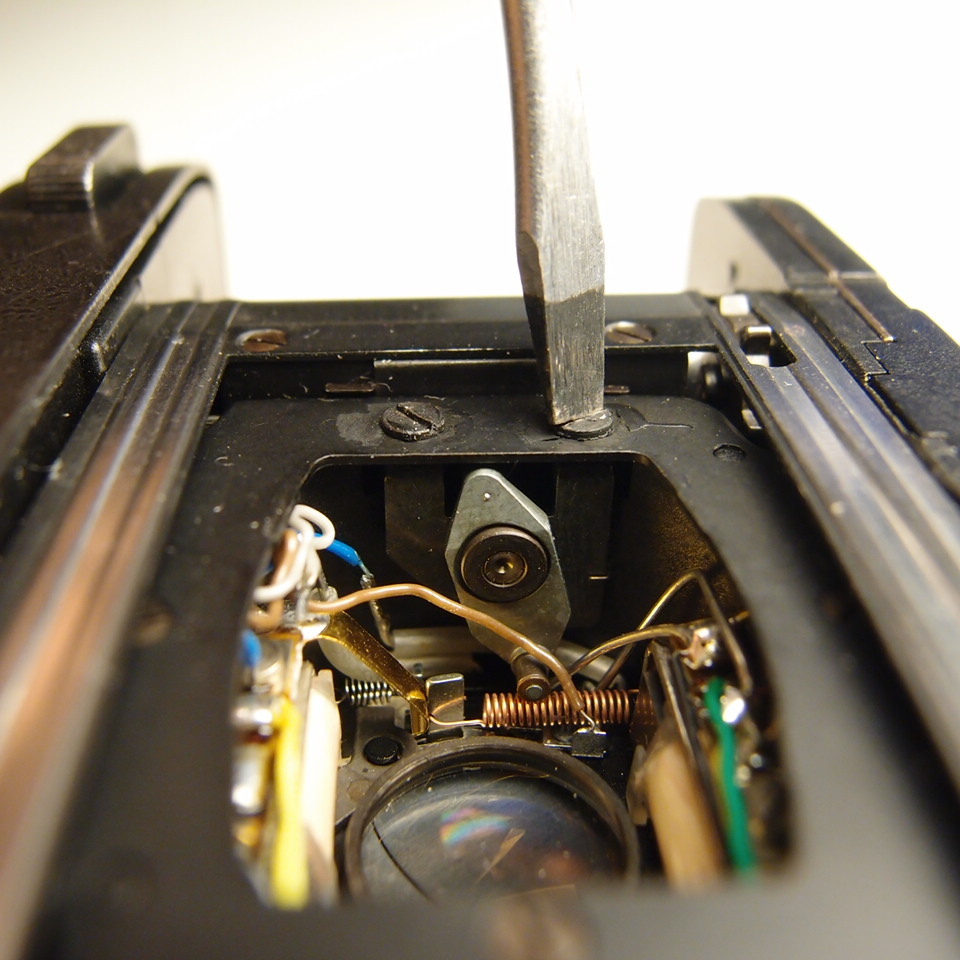
- Double stroke film advance so that the shutter engage pivoting arm is in bottom position/away from the open shutter lever as seen in picture.
- Loosen the two screws holding the pivoting mechanism but DO NOT remove the screws!
- Move the pivoting mechanism in the direction of the red arrow by pulling on one of the screws with your finger nail and insert the wedge.
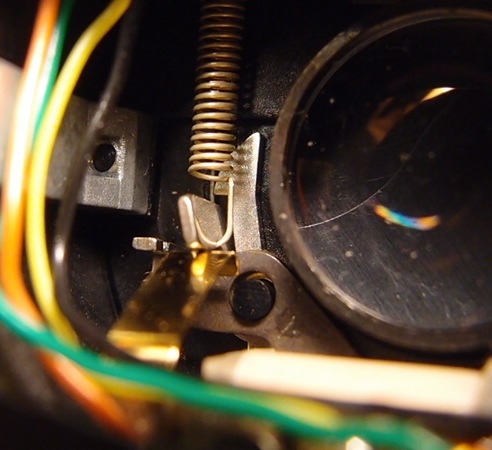
- Open front cover/extend the lens, press the shutter button, slowly advance the film transport while observing the close shutter latch on the left. The close shutter should latch with the right wedge thickness but a small gap as seen in picture is ideal.
- Tighten the 2 screws.
- Reinsert the cone.
- Proceed to How to test.
Other possible shutter related issues:-
- Sticky shutter blades
- Weak Batteries (Batt test shows ok but not enough power to activate the circuitry especially the solenoids)
- Shutter lock up. Happens during over exposure (EL) and with poor electrical contacts + weak batteries.
- Both Solenoids are triggered at the same time / micro seconds apart resulting in under exposure or a blank frame
- Damaged electronics or components (very unlikely)
The above issues will be covered in future posts.
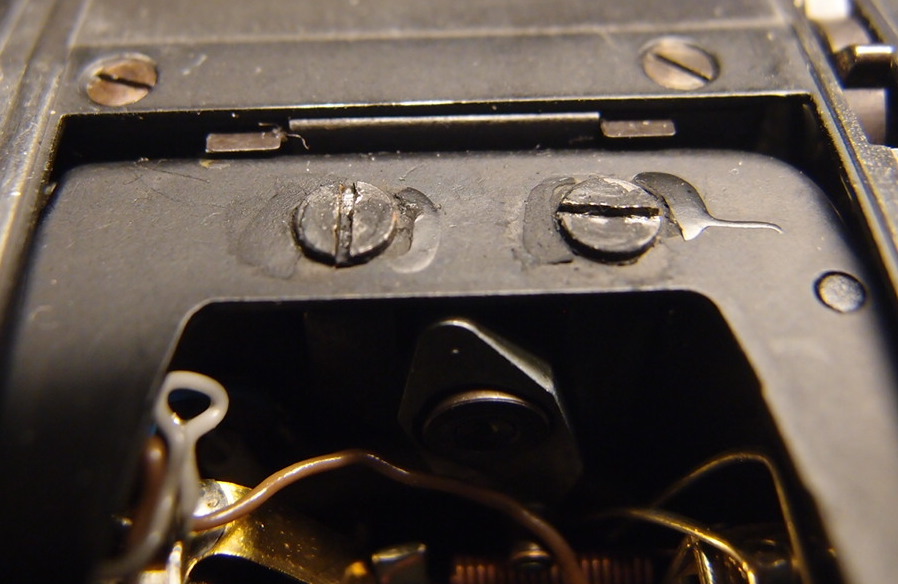
Photos of the screws from models GL, GT & ML