Two Simple Electromechanical Tests.
- Electronic system (Battery, electronics,+ solenoid)
-With a healthy battery inserted
-Remove battery cover
-Remove film back
-Advance film lever (double stroke)
-Depress shutter button (Snap plate sound)
-Point to a light source
I -Gently replace battery cover to make contact (don’t have to screw it in.)
II-Shutter should fire.
-advance film and repeat steps I & II with different ISO and aperture settings.
2. Mechanical system. (latches, springs & shutter blades).
– Remove batteries
– Advance film (double stroke)
– Remove cone
– Close drawbridge/retract lens
proceed with caution on the following steps. Be careful not to scratch rear lens element.
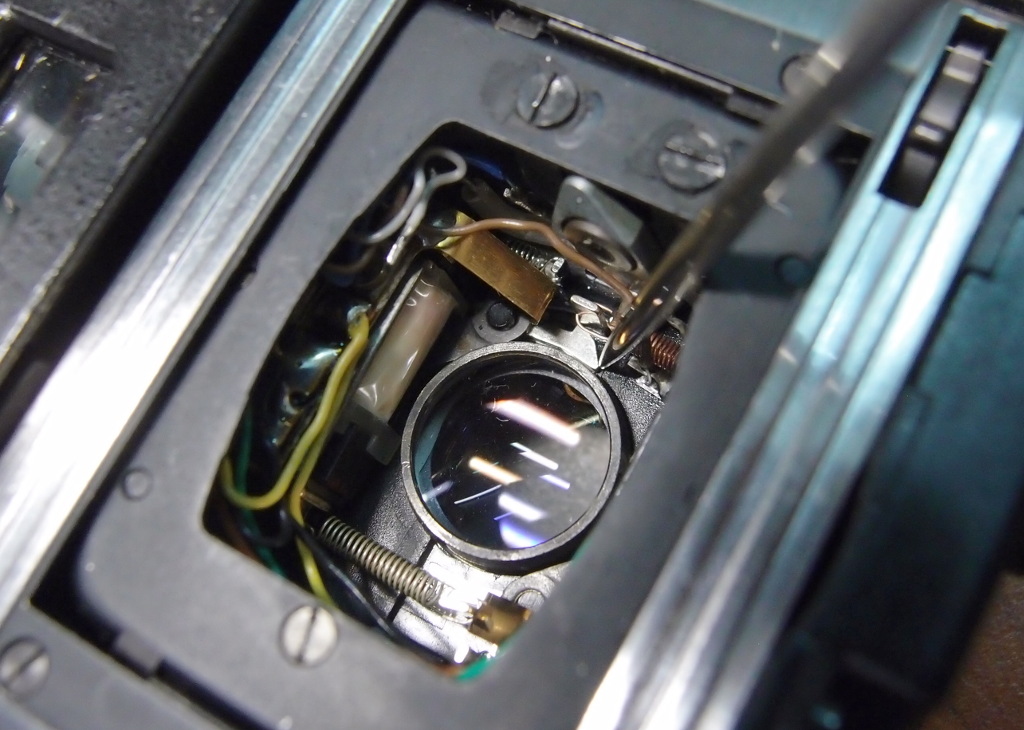
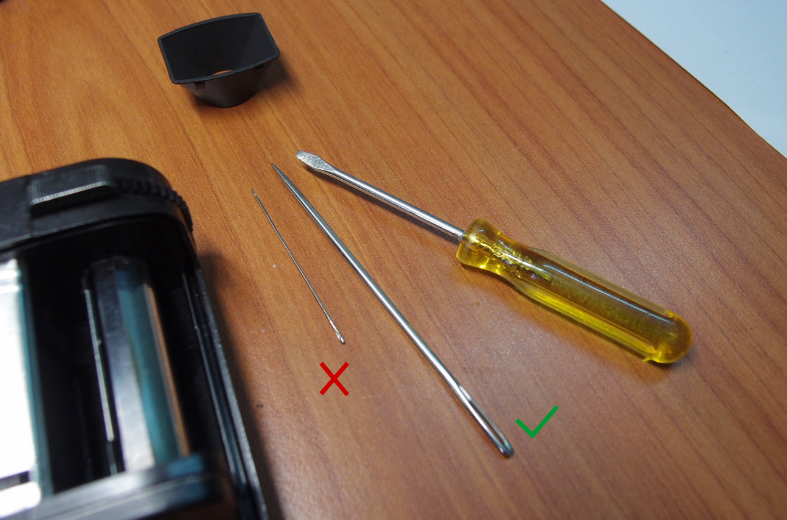
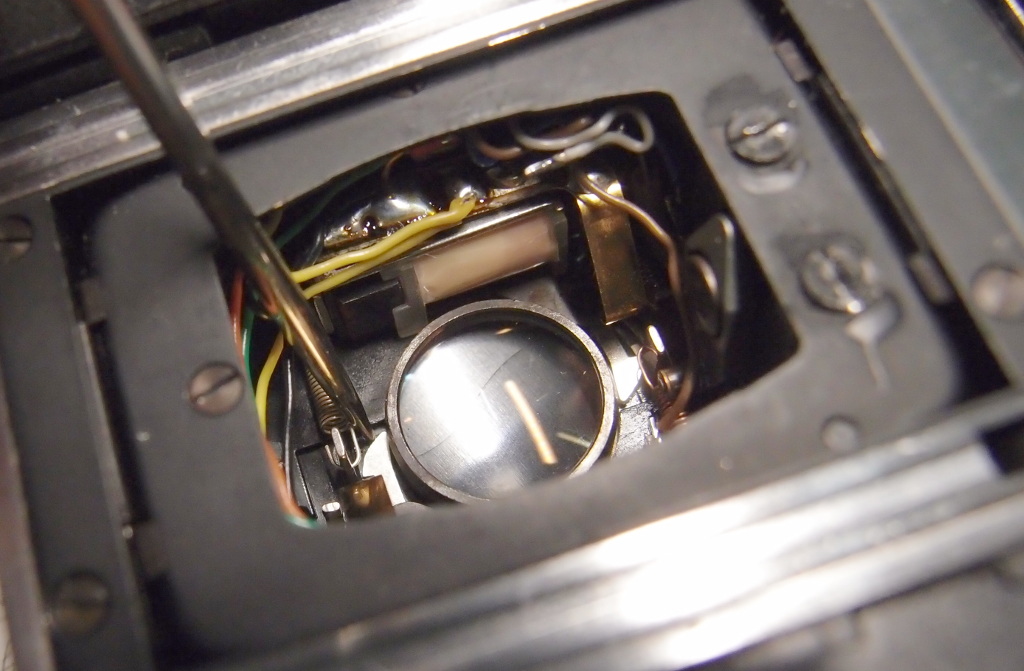
I- Use a larger needle / sharp tool to release open latch (right side), by pushing the tip of the latch towards the lens body.
-the leaf shutter should open
II- release close latch (left side), by pushing the tip of the latch towards the lens body,
– the leaf shutter should close
To re-engage the shutter:
Open drawbridge, depress shutter button, advance film lever (double stroke),
close drawbridge and repeat steps I & II.
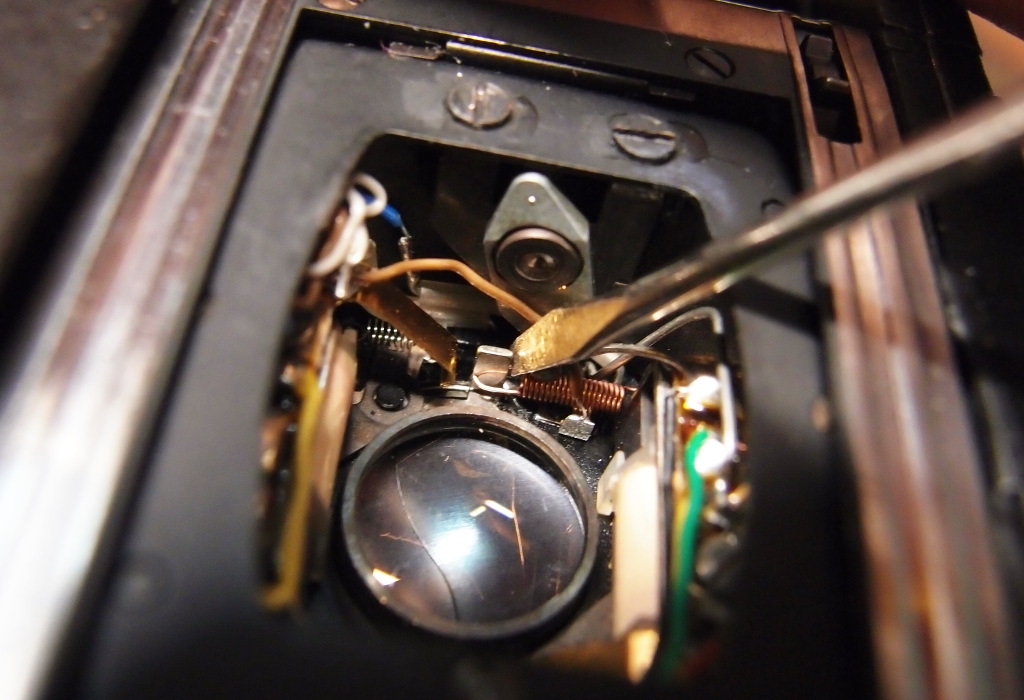
You can also re-engage the shutter by using a small screwdriver – pushing up on the lever.
How to test your Minox 35 camera.
- Insert fresh battery (4x LR44 Alkaline for testing) & open back cover
- Advance film transport (double stroke)
- Check battery health (Battery test button)
- Set ISO to 100
- Check the aperture blades/iris by turning the aperture dial
- Hold camera up to a light source and depress shutter button. In normal working condition, the shutter should open and close. You should be able to see a flicker of light through the lens.
- Point the camera away (low light) and take another shot. The shutter speed should be slower.(the shutter leafs/blades opening & closing are visible from the front as well.)
- Set the ISO to 25 and adjust the aperture to f16, (slowest shutter speed) the shutter should remain open for a while, depending on the lighting condition.
- Set ISO to 100 and test at different aperture settings. Repeat with other ISO settings.
- Emulate over exposure by raising the ISO and opening the aperture. For Eg: in good outdoor light, ISO400 @ f2.8 (Meter needle is above the stripe area) and perform tests looking for shutter lockup behavior. (Read more on Shutter Lockup)
- Repeat test 40 times or more … and for some of us, – till confidence is restored.
- Take the camera out and perform the same test over few days(without film!).
- Check battery health by pressing battery test button and with a multi-meter.
- Perform a shutter speed test. (only if you have tester, skip if not)
- If all is well, load 4 fresh SR44 (Silver Oxide) batteries and a fresh cheap roll of color film (ISO 100 or 200) (This will be a test roll). Get a small notebook & a digital camera. Take photos with both cameras and take notes on lighting conditions, distance, aperture and ISO settings/compensation for every shot. When taking notes, describe the scene/situation instead of only numbering the shots. For eg:
- By the lake, sunny – 3m, f8, iso100 , time & date
- Table by window, overcast – 1.5m, f5.6, iso100, time & date
- Indoor living room, incandescent lamp – 2m, f2.8, iso25 time & date
- Take 2 or 3 shots (Bracketing) especially in low light conditions by lowering the ISO by 1 stop and 2 stops. (read section on exposure).
- in your test roll, also include:
- Over exposures
- flash photos (observe the guide number)
- Long shutter with tripod- night shots (slowest speed- ISO25 @ f16 )
- Back lighting + compensation
- shooting through a 2-3X ND filter in bright conditions
- Focus distance test. Take photos of objects at 1 meter @ f2.8 (use a tape measure).
This process may be tedious, but it will make you a better photographer.
Once finished, develop the roll, examine sharpness, exposure, light leaks, frame overlaps etc. If the roll comes back with some blank frames or other issues, then its back to the repair table.
